%20h.svg)
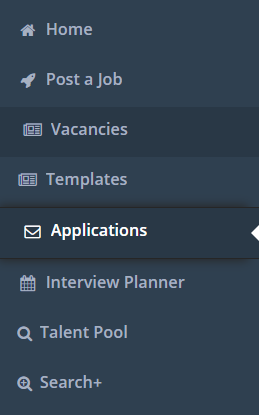
How to view and manage your applications
Once you have posted your roles out to the job boards, you will start receiving applications into the system. To view the applications you will notice numbers will start appearing next to each role (left hand side) on the 'Vacancies' tab. To view the applicants, click on the figure itself i.e. 9/9. The figures represent the candidates viewed and the total number of applicants, so for example 4/15 would mean there are 15 applications of which 4 have been viewed.
When you access applications from the 'Vacancies' tab by clicking on the applications figure/link described above, you are working with applicants for that role only. This is different from the 'Applications' tab where you can view all applications irrespective of which job they applied for in one long list.
Working with a single jobs applications
Walking you through the buttons and drop downs, from left to right:
Add Candidate
Allows you to manually upload a singular or multiple candidates into your role. You'll also notice when you select this option, that once you have entered the candidates details and uploaded their CV, you can tick 'Force allow'. By ticking this option, you are able to update an existing candidate record, as it confirms you are making an amendment. Do not tick this if you are uploading a candidate that is new to this role.
Find Candidates
This function allows searching of the Talent Pool using the criteria for your role such as Title and Location. It will then show you any candidates that fit that criteria, that may have applied for other roles within your business previously. You can then load any of these candidates to the vacancy from the Talent Pool database to contact. This button will only be present if you have our Talent Pool product.
Search & Clear Search
This invokes a pop-up screen that allows you to search and restrict the table to certain candidates. Clients with Talent Pool can also keyword search via the 'Search' option via the 'Talent Pool' field. Otherwise this slide out typically enables you to filter by 'Source' and 'Progress' stage. To filter by anything else i.e. 'Ranking', 'Candidate Name' etc, you can use the column headers in the main grid. ‘Clear Search’ returns the table to normal and clears any filters or data applied.
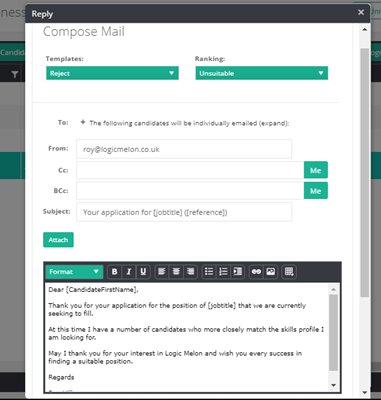
Progress & Reply
Both options update the candidates progress stage, but 'Reply' also sends an email.
A default "Thanks for applying" auto reply style email may be set up when a candidate first applies. Otherwise all other email templates need to be manually chosen from the 'Reply' drop down. Simply select the relevant candidate(s), click 'Reply' and choose the appropriate response. The text in each option can be manually changed on a send by send basis, or an Administrator or member of Client Success can amend these within 'Organisation' > 'Response Templates'.
Signatures, branding, attachments and mail merges can be included.
If you would like any templates automated i.e Reject to be set up behind the red flag, please send a request to Client Success. This can be done on an account, sub-org or user level.
If you want to update a candidates progress stage without sending out an external mail, simply select the relevant candidate(s) and select the desired option from the 'Progress' drop down.
Any action you take, whether that be an internal progress stage update or an external mail, will be stored within the candidate record. If you click the green magnifying glass icon to the left of any candidate and go to the 'Correspondence' tab on the slide out that appears, you can view all history.
Options within the main 'Actions' drop down:
You must have at least 1 applicant selected to be able to access the options in this drop down.
Move Candidate
Allows the candidate to be moved from one vacancy to another. The action will remove them from the first vacancy and add them to the second.
Copy Candidate
Allows the candidate to be copied from one vacancy to another. The action will keep them in the first vacancy as well as add them to the second.
Forward & Grouped Forward
'Forward' will send the recipient(s) an individual email per candidate selected and will spoof the email address of the candidate. This is primarily used for responding to candidates whilst on the go. 'Grouped Forward' will send the recipient(s) 1 email with multiple attachments and will show the consultant doing the forwarding, as the sender.
Add Note
Will add an internal note against the selected candidate(s). This will appear in both the 'Notes' tab on the candidate profile slide out, and in the 'Last Notes' column in the main grid. Notes can be deleted by the author or an Administrator. Notes are advert specific, so will only appear against the candidate in the role they have been added.
Add Tag & Remove Tag
Will add an internal tag against the selected candidate(s). This will appear in both the 'Notes' tab on the candidate profile slide out, and in the 'Tags' column in the main grid. Tags will appear on all instances of the candidate. Tags are primarily used in a keyword format. It is worth agreeing an internal standard, so yourself and others can search based on tag words easily. The free text tag field can be changed to a drop down of agreed values. Simply request this via Client Success, inclusive of sending across the list of tags you wish to have in your drop down.
Hide Applicant(s) & Unhide Applicant(s)
These options hide and unhide selected candidate(s) respectively. To display hidden candidates, either to just view or to unhide, please use the 'Hidden Applications' filter above the 'Actions' drop down, or use 'Unhide Applications' via the 'Actions' drop down, to remove the hidden feature permanently.
Show on map
This will display selected candidates on a map and allow you to enter a location or post/zip code, to generate their distance and time in travel from the role. Note this only works for candidates where we are able to find an address or post/zip code.
Flagging
There are many ways to flag a candidate within LogicMelon. This is one of many alternatives. Highlight the required candidate(s) and select the required flag from the pop up. When selecting multiple candidate this function is designed to only flag one type at a time. The 3 flags (red, blue, green) indicate Red = Not suitable, Blue = Maybe suitable (or suitable for another role) and Green = Suitable.
Vacancy/Applicant results
The main grid contains the following:
Ranking
The circle ‘P’ indicates whether the candidate has previously applied for another role. Grey = No, Green = Yes
The 3 flags (red, blue, green) indicate Red = Not suitable, Blue = Maybe Suitable (or suitable for another role) and Green = Suitable.
You may change their suitability by clicking on the appropriate flag.
First Name, Last Name, Contact Information & Application Date
These columns include the applicants full name, contact information i.e. e-mail address and telephone number, and the date/time of application.
Progress
Indicates at what stage the candidate has progressed to. The stage will automatically update based on e-mails sent via the ‘Reply’ drop down, but can be manually changed via the ‘Progress’ drop down. Progress stages can be configured to suit.
Source
The source of where the candidate applied from. This is typically the board/site where the candidate found the advertised position, but can also include candidates added internally via the 'Add Candidate' feature.
Tags
A list of any tags added.
Last Note
The last note added if applicable. Notes can be viewed in full via the candidate profile slide out in the 'Notes' tab.
Viewing information via the candidate profile slide out
Candidates full application details can be viewed by clicking on the green magnifying glass icon to the left of the candidate.
Once loaded, there are various sub-tabs.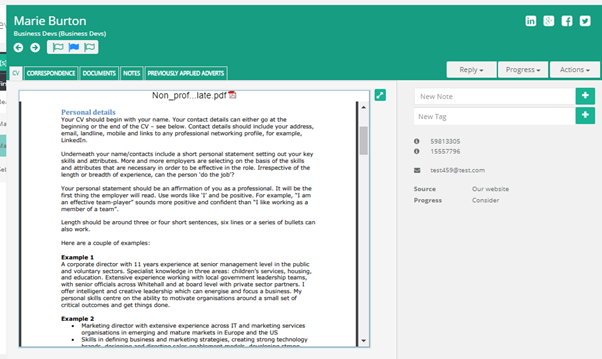
CV
This displays a copy of the CV the applicant applied with. You can view this via the 'default' viewer which opens all file types, the Microsoft viewer which opens Word file types, and the Google viewer which opens Word and PDF file types. Once a viewer is chosen, it defaults to this option moving forward, however can be changed at any point. Across the viewers you should also have the ability to save, print and keyword highlight (options will differ per viewer).
To the side, you can see some internal detail such as their LogicMelon application IDs, their contact information, their source and current progress stage. You also have the ability to add a note or tag at this stage. Above and top right, you have shortcuts to view their social media profiles. Above and top left, you have access to rank and also next and previous arrows, to go back and fourth between applicants within the role.
Correspondence
This tab contains both correspondence, progress stages and actions. An example below shows the date/time and who added a note, the date/time and who changed the candidate stage and to what status, and a piece of correspondence. Most applications arrive via mail and so their original application mail i.e. letter of application, appears under the correspondence tab. The information on this tab can be filtered and printed. 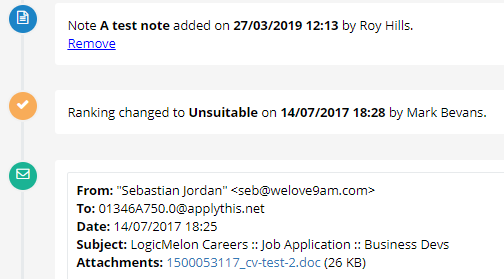
Documents
This tab contains any documents that have been stored against the applicant.
Notes
This tab contains a list of notes as well as the date/time and author of the note.
Previously Applied Adverts
This is a detailed list of previously applied for adverts with links to these adverts.
Applications
The 'Applications' tab is the general pool of applicants, not in relation to a specific vacancy. This area is otherwise identical to the advert specific applicant area, besides an additional column named 'Advert Title', which states and links the relevant job each applicant relates to, and automatically has a last 7 days filter applied to the 'Application Date' column, which can of course be amended.